Purchase Items
Next, you will develop a program using the Payment API to purchase items using MobaCoins.
Starting the Purchase of a Paid Item
First, begin developing a screen for purchasing MobaCoins and chargeable items.
Develop payment_start.php as follows.
<?php
require_once ('OAuth.php');
require_once ('validator.php');

// Validate Request from Gadget Server
$valid = RequestValidator::validate();
if (!$valid) {
	// Respond Error Page
	print('<html><body><p>Invalid Request from Gadget Server</p></body></html>');
	exit ;
}
?>
<!DOCTYPE html>
<html>
	<head>
		<meta http-equiv="Content-Type" content="text/html; charset=UTF-8">
		<meta name="viewport" content="width=device-width" />
	</head>
	<body style="margin:0; text-align:center;">
		<br>
		<a href="#" onclick="mobage.shellapp.Service.showBankUI();">Click to Buy MobaCoin</a>
		<br>
		<a href="?url=http%3A%2F%2Fdev.gameserver.com%2Fpayment_confirm.php">Click to Buy Sample Item</a>
	</body>
</html>
As in the previous chapter, use the validator.php RequestValidator class to verify the validity of the request from the Gadget server.
require_once ('OAuth.php');
require_once ('validator.php');

// Validate Request from Gadget Server
$valid = RequestValidator::validate();
if (!$valid) {
	// Respond Error Page
	print('<html><body><p>Invalid Request from Gadget Server</p></body></html>');
	exit ;
}
Next, create the HTML. The dialog that is displayed for purchasing MobaCoins is also provided as a JavaScript API, and you will use it in the program. When the user's MobaCoin balance is too low as shown on the platform's settlement screen (described later), the user can purchase MobaCoins elsewhere, however, if you want to provide this functionality in your application, use mobage.shellapp.Service.showBankUI().
<!DOCTYPE html>
<html>
	<head>
		<meta http-equiv="Content-Type" content="text/html; charset=UTF-8">
		<meta name="viewport" content="width=device-width" />
	</head>
	<body style="margin:0; text-align:center;">
		<br>
		<a href="#" onclick="mobage.shellapp.Service.showBankUI();">Click to Buy MobaCoin</a>
		<br>
		<a href="?url=http%3A%2F%2Fdev.gameserver.com%2Fpayment_confirm.php">Click to Buy Sample Item</a>
	</body>
</html>
The Payment API must be called to purchase an item. This will be described next using payment_confirm.php. A link to payment_confirm.php is added here.
Beginning a Settlement Transaction
Next, you will use the Payment API to create a Payment entry and develop a screen for displaying details about the chargeable item.
Develop payment_confirm.php as follows.
<?php
require_once ('OAuth.php');
require_once ('validator.php');

// Validate Request from Gadget Server
$valid = RequestValidator::validate();
if (!$valid) {
	// Respond Error Page
	print('<html><body><p>Invalid Request from Gadget Server</p></body></html>');
	exit ;
}

// Consumer Key from DevSite (or DevPortal)
$consumer_key = 'YourConsumerKey';
// Consumer Secret from DevSite (or DevPortal)
$consumer_secret = 'YourConsumerSecret';
// OAuth Consumer
$consumer = new OAuthConsumer($consumer_key, $consumer_secret, NULL);

// Request from Gadget Server
$request_from_gadget = OAuthRequest::from_request(NULL, NULL, NULL);
// opensocial_viewer_id from Gadget Server
$user_id = $request_from_gadget -> get_parameter('opensocial_viewer_id');
// Token from Gadget Server
$token_from_gadget = new OAuthToken($request_from_gadget -> get_parameter('oauth_token'), $request_from_gadget -> get_parameter('oauth_token_secret'));

// EndPoint URL for Payment API
$url = "http://sb.sp.app.mbga.jp/api/restful/v1/payment/@me/@self/@app?xoauth_requestor_id=$user_id";
// HTTP Method
$method = 'POST';
// Parse Parameters
parse_str(parse_url($url, PHP_URL_QUERY), $params);
// Request to API Server
$request_to_API = OAuthRequest::from_consumer_and_token($consumer, $token_from_gadget, $method, $url, $param);
// Generate OAuth Signature
$request_to_API -> sign_request(new OAuthSignatureMethod_HMAC_SHA1(), $consumer, $token_from_gadget);
// Create Authorization Header
$auth_header = $request_to_API -> to_header();

// POST Body with Payment Entry
$payment_entry = array(
	'callbackUrl' => 'http://dev.gameserver.com/payment_callback.php',
	'finishUrl' => 'http://dev.gameserver.com/payment_finish.php',
	'entry' => array(
		array(
			'itemId' => 12,
			'name' => 'Sample Item',
			'unitPrice' => 100,
			'amount' => 3,
			'description' => 'This is a sample transaction',
			'imageUrl' => 'https://dev.gameserver.com/img/item/12.gif'
		)
	)
);
$body = json_encode($payment_entry);

// Execute HTTP Request to API Server
$curl = curl_init($url);
curl_setopt($curl, CURLOPT_POST, true);
curl_setopt($curl, CURLOPT_POSTFIELDS, $body);
curl_setopt($curl, CURLOPT_RETURNTRANSFER, true);
curl_setopt($curl, CURLOPT_FAILONERROR, false);
curl_setopt($curl, CURLOPT_SSL_VERIFYPEER, false);
curl_setopt($curl, CURLOPT_ENCODING , "gzip");
curl_setopt($curl, CURLOPT_HTTPHEADER, array($auth_header));
$response = curl_exec($curl);
$status_code = curl_getinfo($curl, CURLINFO_HTTP_CODE);
curl_close($curl);

// Check Response from API Server
if ($status_code != 201) {
	// Respond Error Page
	print("<html><body><p>Got an error from API Server ($status_code, $response)</p></body></html>");
	exit ;
}

// Parse JSON in Response
$payment = json_decode($response);
$payment_id = $payment -> {'payment'} -> {'id'};
$status = $payment -> {'payment'} -> {'status'}; // Always 0
$entry = $payment -> {'payment'} -> {'entry'};
$item_id =  $entry[0] -> {'itemId'};
$name =  $entry[0] -> {'name'};
$unit_price =  $entry[0] -> {'unitPrice'};
$amount =  $entry[0] -> {'amount'};
$total = $unit_price * $amount;
$endpoint_url = $payment -> {'payment'} -> {'endpointUrl'};

// Store Payment Data into DataBase
// ex) INSERT INTO payment (payment_id, user_id, item_id, amount, total, status, item_given) VALUES ($payment_id, $user_id, $item_id, $amount, $total, $status, 0);

?>
<!DOCTYPE html>
<html>
	<head>
		<meta http-equiv="Content-Type" content="text/html; charset=UTF-8">
		<meta name="viewport" content="width=device-width" />
	</head>
	<body style="margin:0; text-align:center;">
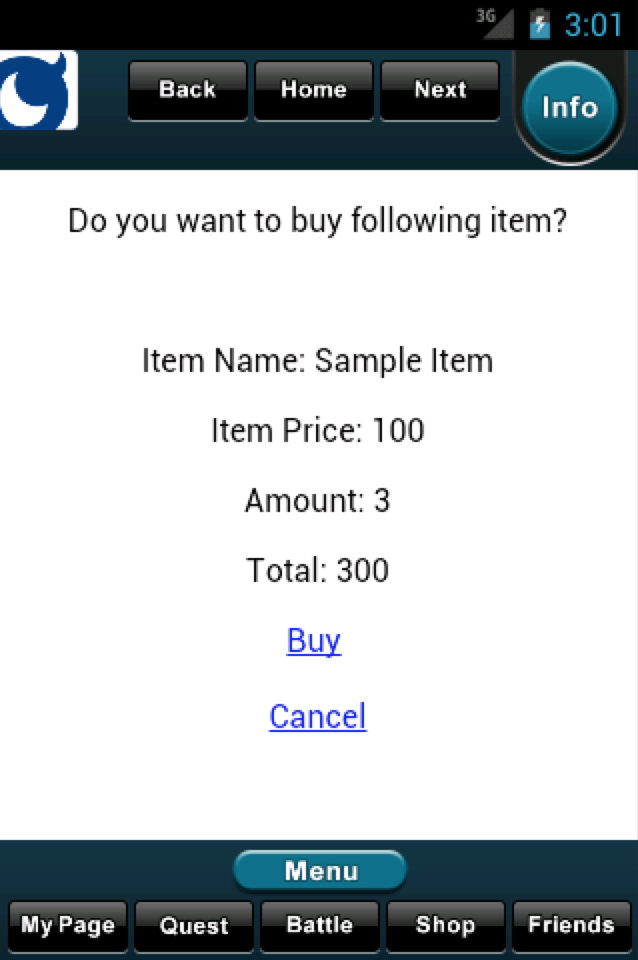
		<p>Do you want to buy following item?</p>
		<br>
		<p>Item Name: <?=$name ?></p>
		<p>Item Price: <?=$unit_price ?></p>
		<p>Amount: <?=$amount ?></p>
		<p>Total: <?=$total ?></p>
		<a href="<?=$endpoint_url ?>">Buy</a>
		<br>
		<br>
		<a href="?url=http%3A%2F%2Fdev.gameserver.com%2Fpayment_start.php">Cancel</a>
	</body>
</html>
The program flow is explained below.
Since the procedure for verifying the validity of the first request from the Gadget server to the game server is the same as that described in the previous chapter, it will be omitted here.
Next, take steps needed to access the API server. First, prepare Consumer Key and Consumer Secret, which are required for the API server's OAuth parameters. Since the POST method of the Payment API uses the Proxy model (which uses OAuth token), you must first get the OAuth token and opensocial_viewer_id (ID of the logged in user who is browsing the screen), which were passed from the Gadget server.
// Consumer Key from DevSite (or DevPortal)
$consumer_key = 'YourConsumerKey';
// Consumer Secret from DevSite (or DevPortal)
$consumer_secret = 'YourConsumerSecret';
// OAuth Consumer
$consumer = new OAuthConsumer($consumer_key, $consumer_secret, NULL);

// Request from Gadget Server
$request_from_gadget = OAuthRequest::from_request(NULL, NULL, NULL);
// opensocial_viewer_id from Gadget Server
$user_id = $request_from_gadget -> get_parameter('opensocial_viewer_id');
// Token from Gadget Server
$token_from_gadget = new OAuthToken($request_from_gadget -> get_parameter('oauth_token'), $request_from_gadget -> get_parameter('oauth_token_secret'));
Now that we have all required information, we can generate the OAuth header. Create /payment/@me/@self/@app, which is the path used for creating the Payment entry based on the Endpoint URL of the Sandbox environment. For the Proxy model, set the value of opensocial_view_id that was obtained as described above for the request parameter xoauth_requestor_id.
// EndPoint URL for Payment API
$url = "http://sb.sp.app.mbga.jp/api/restful/v1/payment/@me/@self/@app?xoauth_requestor_id=$user_id";
// HTTP Method
$method = 'POST';
// Parse Parameters
parse_str(parse_url($url, PHP_URL_QUERY), $params);
// Request to API Server
$request_to_API = OAuthRequest::from_consumer_and_token($consumer, $token_from_gadget, $method, $url, $param);
// Generate OAuth Signature
$request_to_API -> sign_request(new OAuthSignatureMethod_HMAC_SHA1(), $consumer, $token_from_gadget);
// Create Authorization Header
$auth_header = $request_to_API -> to_header();
Next, prepare the JSON-format POST data that contains the Payment entry information. Set the callbackUrl (the URL for reporting settlement completion), finishUrl (the URL pointing to the Settlement Completion screen), and information about the chargeable item in an Array and then use the json_encode function to convert the data to JSON format. The program implementation for the URLs that are set for callbackUrl and finishUrl is described later.
// POST Body with Payment Entry
$payment_entry = array(
	'callbackUrl' => 'http://dev.gameserver.com/payment_callback.php',
	'finishUrl' => 'http://dev.gameserver.com/payment_finish.php',
	'entry' => array(
		array(
			'itemId' => 12,
			'name' => 'Sample Item',
			'unitPrice' => 100,
			'amount' => 3,
			'description' => 'This is a sample transaction',
			'imageUrl' => 'https://dev.gameserver.com/img/item/12.gif'
		)
	)
);
$body = json_encode($payment_entry);
Execute the request to the API server using the OAuth Authorization header and POST data that were generated as described above. Get the response data and HTTP status code from the API server.
// Execute HTTP Request to API Server
$curl = curl_init($url);
curl_setopt($curl, CURLOPT_POST, true);
curl_setopt($curl, CURLOPT_POSTFIELDS, $body);
curl_setopt($curl, CURLOPT_RETURNTRANSFER, true);
curl_setopt($curl, CURLOPT_FAILONERROR, false);
curl_setopt($curl, CURLOPT_SSL_VERIFYPEER, false);
curl_setopt($curl, CURLOPT_ENCODING , "gzip");
curl_setopt($curl, CURLOPT_HTTPHEADER, array($auth_header));
$response = curl_exec($curl);
$status_code = curl_getinfo($curl, CURLINFO_HTTP_CODE);
curl_close($curl);
If the request was successful, the Payment API POST method will return 201 for the HTTP status code. If a value other than 201 is returned, make sure to return an error screen.
// Check Response from API Server
if ($status_code != 201) {
	// Respond Error Page
	print("<html><body><p>Got an error from API Server ($status_code, $response)</p></body></html>");
	exit ;
}
When the HTTP status code is 201, parse the JSON data which is included in the response data to retrieve the Payment entry. Although it is not implemented in this tutorial, when the status is 0, store the Payment data in the database.
Finally, embed the information about the chargeable item in the HTML. Also, embed the endpoint value that contains the URL of the settlement screen for the platform in the link target.
// Parse JSON in Response
$payment = json_decode($response);
$payment_id = $payment -> {'payment'} -> {'id'};
$status = $payment -> {'payment'} -> {'status'}; // Always 0
$entry = $payment -> {'payment'} -> {'entry'};
$item_id =  $entry[0] -> {'itemId'};
$name =  $entry[0] -> {'name'};
$unit_price =  $entry[0] -> {'unitPrice'};
$amount =  $entry[0] -> {'amount'};
$total = $unit_price * $amount;
$endpoint_url = $payment -> {'payment'} -> {'endpointUrl'};

// Store Payment Data into DataBase
// ex) INSERT INTO payment (payment_id, user_id, item_id, amount, total, status, item_given) VALUES ($payment_id, $user_id, $item_id, $amount, $total, $status, 0);

?>
<!DOCTYPE html>
<html>
	<head>
		<meta http-equiv="Content-Type" content="text/html; charset=UTF-8">
		<meta name="vie?port" content="width=device-width" />
	</head>
	<body style="margin:0; text-align:center;">
		<p>Do you want to buy following item?</p>
		<br>
		<p>Item Name: <?=$name ?></p>
		<p>Item Price: <?=$unit_price ?></p>
		<p>Amount: <?=$amount ?></p>
		<p>Total: <?=$total ?></p>
		<a href="<?=$endpoint_url ?>">Buy</a>
		<br>
		<br>
		<a href="?url=http%3A%2F%2Fdev.gameserver.com%2Fpayment_start.php">Cancel</a>
	</body>
</html>
Receiving the Settlement Confirmation Notification
Next, you will develop a program for receiving the settlement confirmation notification that you specified in callbackUrl when you created the Payment entry. The purpose of this program is to report to the platform that settlement completed normally, rather than using HTML to display this information. The callback is called immediately after switching from the game to the platform settlement screen and the user confirms the settlement.
The following code shows how to develop payment_callback.php.
<?php
require_once ('OAuth.php');
require_once ('validator.php');

// Validate Request from Platform Server
$valid = RequestValidator::validate();
if (!$valid) {
	// Respond Error Page
	print('Invalid Request from Mobage Server');
	exit ;
}

// Getting Payment Parameters
$app_id = $_REQUEST['opensocial_app_id'];
$viewer_id = $_REQUEST['opensocial_viewer_id'];
$owner_id = $_REQUEST['opensocial_owner_id'];
$payment_id = $_REQUEST['payment_id'];
$updated = $_REQUEST['updated'];
$status = $_REQUEST['status'];

// Update Payment Status on Database
// ex) UPDATE payment SET status=$status WHERE payment_id=$payment_id AND status=0 AND item_given=0;
// If No Rows Updated, Return Error HTTP Status like 400.

if($status != 10){
	// Respond Error
 	header("HTTP/1.0 400 Bad Request ");
	print('NG');
	exit ;
}

print('OK');
?>
The program flow is explained below.
Although the settlement confirmation notification request is sent from the platform itself rather than from the Gadget server, the validity of the request is verified in the same way as if the request came from the Gadget server.
require_once ('OAuth.php');
require_once ('validator.php');

// Validate Request from Platform Server
$valid = RequestValidator::validate();
if (!$valid) {
	// Respond Error Page
	print('Invalid Request from Mobage Server');
	exit ;
}
Next, get each of the request parameters assigned in the settlement confirmation notification request and update the status mainly by setting payment_id for the key. For now, leave items that have not been assigned yet as they are. Although it is not implemented in this tutorial, access the game server database, get the relevant Payment information from the payment_id, and update the status in the confirmation.
If you can't find any data that has been started, the request must have been duplicated or unexpected, so return an HTTP status code of 400 to indicate an error.
Also, if the status assigned in the request parameter is not 10, it means that this is not a normal settlement, so in this case you should also return an HTTP status code of 400 to indicate an error .
// Getting Payment Parameters
$app_id = $_REQUEST['opensocial_app_id'];
$viewer_id = $_REQUEST['opensocial_viewer_id'];
$owner_id = $_REQUEST['opensocial_owner_id'];
$payment_id = $_REQUEST['payment_id'];
$updated = $_REQUEST['updated'];
$status = $_REQUEST['status'];

// Update Payment Status on Database
// ex) UPDATE payment SET status=$status WHERE payment_id=$payment_id AND status=0 AND item_given=0;
// If No Rows Updated, Return Error HTTP Status like 400.

if($status != 10){
	// Respond Error
 	header("HTTP/1.0 400 Bad Request ");
	print('NG');
	exit ;
}
Finally, if processing is successful, return the string OK as the response.
print('OK');
If an error occurs during the start of item assignment, return an HTTP status code other than 200. The purchase will be treated as an error, and the MobaCoin expenditure will be canc?led.
Displaying the Purchase Completed Page
Next, you will develop the Purchase Completed page that was specified in finishUrl when the Payment entry was created. When settlement confirmation notification processing ends successfully, the screen switches from the settlement screen of the platform. The Purchase Completed page will be displayed and the Payment entry will finally be obtained. The completion of settlement status will be confirmed and the item assignment confirmation process will be performed.
The following code shows how to develop payment_finish.php.
<?php
require_once ('OAuth.php');
require_once ('validator.php');

// Validate Request from Gadget Server
$valid = RequestValidator::validate();
if (!$valid) {
	// Respond Error Page
	print('<html><body><p>Invalid Request from Gadget Server</p></body></html>');
	exit ;
}

// Consumer Key from DevSite (or DevPortal)
$consumer_key = 'YourConsumerKey';
// Consumer Secret from DevSite (or DevPortal)
$consumer_secret = 'YourConsumerSecret';
// OAuth Consumer
$consumer = new OAuthConsumer($consumer_key, $consumer_secret, NULL);

// PaymentID from Gadget Server
$payment_id = $_REQUEST['payment_id'];
// UserID from Gadget Server
$user_id = $_REQUEST['opensocial_viewer_id'];
// ApplicationID
$app_id = 'YourApplicationID';

// EndPoint URL for Payment API
$url = "http://sb.sp.app.mbga.jp/api/restful/v1/payment/$user_id/@self/@app/$payment_id?xoauth_requestor_id=$app_id";
// HTTP Method
$method = 'GET';
// Parse Parameters
parse_str(parse_url($url, PHP_URL_QUERY), $params);
// Request to API Server
$request_to_API = OAuthRequest::from_consumer_and_token($consumer, NULL, $method, $url, $param);
// Generate OAuth Signature
$request_to_API -> sign_request(new OAuthSignatureMethod_HMAC_SHA1(), $consumer, NULL);
// Create Authorization Header
$auth_header = $request_to_API -> to_header();

// Execute HTTP Request to API Server
$curl = curl_init($url);
curl_setopt($curl, CURLOPT_RETURNTRANSFER, true);
curl_setopt($curl, CURLOPT_FAILONERROR, false);
curl_setopt($curl, CURLOPT_SSL_VERIFYPEER, false);
curl_setopt($curl, CURLOPT_ENCODING , "gzip");
curl_setopt($curl, CURLOPT_HTTPHEADER, array($auth_header));
$response = curl_exec($curl);
$status_code = curl_getinfo($curl, CURLINFO_HTTP_CODE);
curl_close($curl);

// Check Response from API Server
if ($status_code != 200) {
	// Respond Error Page
	print('<html><body><p>Got an error from API Server (' . $status_code . ', ' . $response . ')</p></body></html>');
	exit ;
}

// Parse JSON in Response
$payment = json_decode($response);
$payment_id = $payment -> {'payment'} -> {'id'};
$status = $payment -> {'payment'} -> {'status'};

// Update Payment Status on Database
// ex) UPDATE payment SET status=$status WHERE payment_id=$payment_id AND status=10 AND item_given=0;
// If No Rows Updated, Respond Error Page

if($status != 10){
	// Respond Error Page
	print('<html><body><p>Invalid Payment Status</p></body></html>');
	exit ;
}

// Give Item to the User on Database
// ex1) INSERT INTO item (user_id, item_id, payment_id, deleted) VALUES ($user_id, $item_id, $payment_id, 0);
// ex2) UPDATE payment SET item_given=1 WHERE payment_id=$payment_id AND status=10 AND item_given=0;
// If No Rows Updated, Respond Error Page and Rollback the Given Item

?>
<!DOCTYPE html>
<html>
	<head>
		<meta http-equiv="Content-Type" content="text/html; charset=UTF-8">
		<meta name="viewport" content="width=device-width" />
	</head>
	<body style="margin:0; text-align:center;">
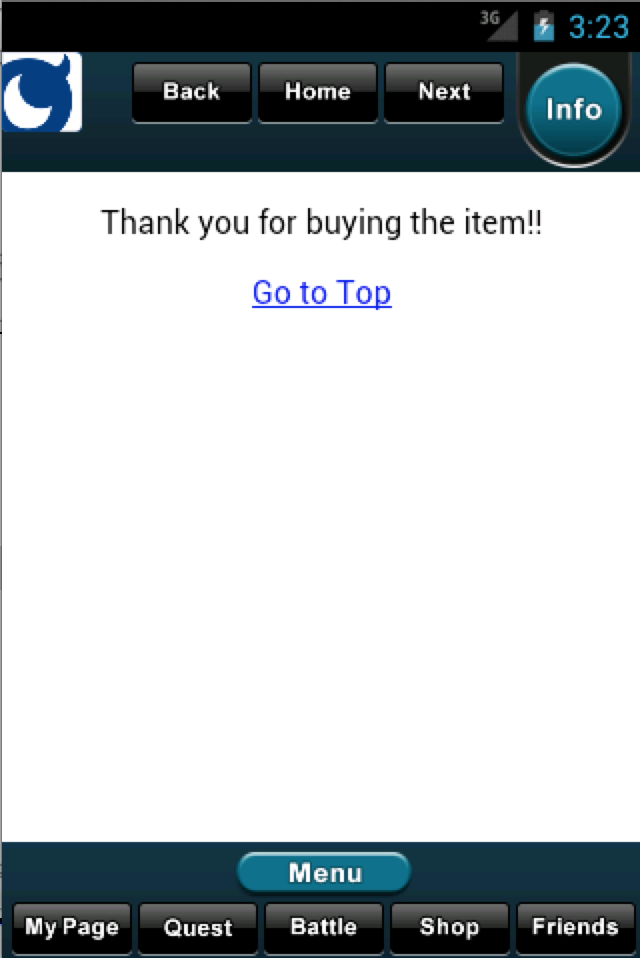
		<p>Thank you for buying the item!!</p>
		<a href="?url=http%3A%2F%2Fdev.gameserver.com%2Findex.html">Go to Top</a>
	</body>
</html>
The program flow is explained below.
First, since the Purchase Completed page is requested via the Gadget server, you should verify the validity of the request in the same way as explained above.
Next, take steps needed to access the API server. First, prepare Consumer Key and Consumer Secret, which are required for the API server's OAuth parameters. You can use the Trusted model (which does not use the OAuth token) for the GET method of the Payment API. Get the Payment entry ID and opensocial_viewer_id (ID of login user who is browsing the screen), which were passed from the Gadget server. Since the application ID is also required for the Trusted model, define it in advance. Since the application ID can be verified on the "Common" page on the Mobage Developer Site, set that value in the program.
// Consumer Key from DevSite (or DevPortal)
$consumer_key = 'YourConsumerKey';
// Consumer Secret from DevSite (or DevPortal)
$consumer_secret = 'YourConsumerSecret';
// OAuth Consumer
$consumer = new OAuthConsumer($consumer_key, $consumer_secret, NULL);

// PaymentID from Gadget Server
$payment_id = $_REQUEST['payment_id'];
// UserID from Gadget Server
$user_id = $_REQUEST['opensocial_viewer_id'];
// ApplicationID
$app_id = 'YourApplicationID';
Now that we have all required information, we can generate the OAuth header. Create the path /payment/{userId}/@self/@app/{paymentId} based on the Endpoint URL of the Sandbox environment. This is used for getting the Payment entry. For the Trusted model, set the request parameter xoauth_requestor_id to the value of the application ID. Since @me cannot be used because no OAuth token is set, specify the user ID directly.
// EndPoint URL for Payment API
$url = "http://sb.sp.app.mbga.jp/api/restful/v1/payment/$user_id/@self/@app/$payment_id?xoauth_requestor_id=$app_id";
// HTTP Method
$method = 'GET';
// Parse Parameters
parse_str(parse_url($url, PHP_URL_QUERY), $params);
// Request to API Server
$request_to_API = OAuthRequest::from_consumer_and_token($consumer, NULL, $method, $url, $param);
// Generate OAuth Signature
$request_to_API -> sign_request(new OAuthSignatureMethod_HMAC_SHA1(), $consumer, NULL);
// Create Authorization Header
$auth_header = $request_to_API -> to_header();
Execute the request to the API server using the OAuth Authorization header that was created as described above. Get the response data and HTTP status code from the API server.
// Execute HTTP Request to API Server
$curl = curl_init($url);
curl_setopt($curl, CURLOPT_RETURNTRANSFER, true);
curl_setopt($curl, CURLOPT_FAILONERROR, false);
curl_setopt($curl, CURLOPT_SSL_VERIFYPEER, false);
curl_setopt($curl, CURLOPT_ENCODING , "gzip");
curl_setopt($curl, CURLOPT_HTTPHEADER, array($auth_header));
$response = curl_exec($curl);
$status_code = curl_getinfo($curl, CURLINFO_HTTP_CODE);
curl_close($curl);
If the request was successful, the Payment API GET method will return 200 for the HTTP status code. If a value other than 200 is returned, make sure to return an error page.
// Check Response from API Server
if ($status_code != 200) {
	// Respond Error Page
	print('<html><body><p>Got an error from API Server (' . $status_code . ', ' . $response . ')</p></body></html>');
	exit ;
}
When the HTTP status code is 200, parse the JSON data which is included in the response data to get the status value, and verify that the settlement status is 10 (successful). When the settlement status is 10, the confirmation process for item assignment will be performed. Although it is not implemented in this tutorial, you should access the game server database and confirm that the relevant payment_id record is present with a status of unconfirmed, and then set the status to confirmed.
If, by chance, the settlement status is something other than 10, then settlement will not have been completed. In this case, you should not confirm the assignment of the chargeable item. When this processing is not performed, the chargeable item will be assigned anyway, whether or not the user spends MobaCoins.
// Parse JSON in Response
$payment = json_decode($response);
$payment_id = $payment -> {'payment'} -> {'id'};
$status = $payment -> {'payment'} -> {'status'};

// Update Payment Status on Database
// ex) UPDATE payment SET status=$status WHERE payment_id=$payment_id AND status=10 AND item_given=0;
?// If No Rows Updated, Respond Error Page

if($status != 10){
	// Respond Error Page
	print('<html><body><p>Invalid Payment Status</p></body></html>');
	exit ;
}

// Give Item to the User on Database
// ex1) INSERT INTO item (user_id, item_id, payment_id, deleted) VALUES ($user_id, $item_id, $payment_id, 0);
// ex2) UPDATE payment SET item_given=1 WHERE payment_id=$payment_id AND status=10 AND item_given=0;
// If No Rows Updated, Respond Error Page and Rollback the Given Item
The last step is to display a screen for notifying the user that the purchase has completed.
Setting up Game Points (iOS only)
iOS games do not use MobaCoins; instead they use a virtual currency specific to the game. This virtual currency is called "game points" and must be set up on the Mobage Developer Portal.
On The Mobage Developer Portal, click "Apps" > "MyFirstShellApp" > "iOS" and set the "Game point name" and "Game point symbol". Register MyPoint and MP here.
Verifying Operation on an Actual Device
Place the four PHP programs that you developed on the game server as follows.
| PHP file | URL |
|---|---|
| payment_start.php | http://dev.gameserver.com/payment_start.php |
| payment_confirm.php | http://dev.gameserver.com/payment_confirm.php |
| payment_callback.php | http://dev.gameserver.com/payment_callback.php |
| payment_finish.php | http://dev.gameserver.com/payment_finish.php |
Now, add a link to payment_start.php in the index.html that you created in the previous chapter, as shown below.
<!DOCTYPE html>
<html>
	<head>
		<meta http-equiv="Content-Type" content="text/html; charset=UTF-8">
		<meta name="viewport" content="width=device-width" />
	</head>
	<body style="margin:0; text-align:center;">
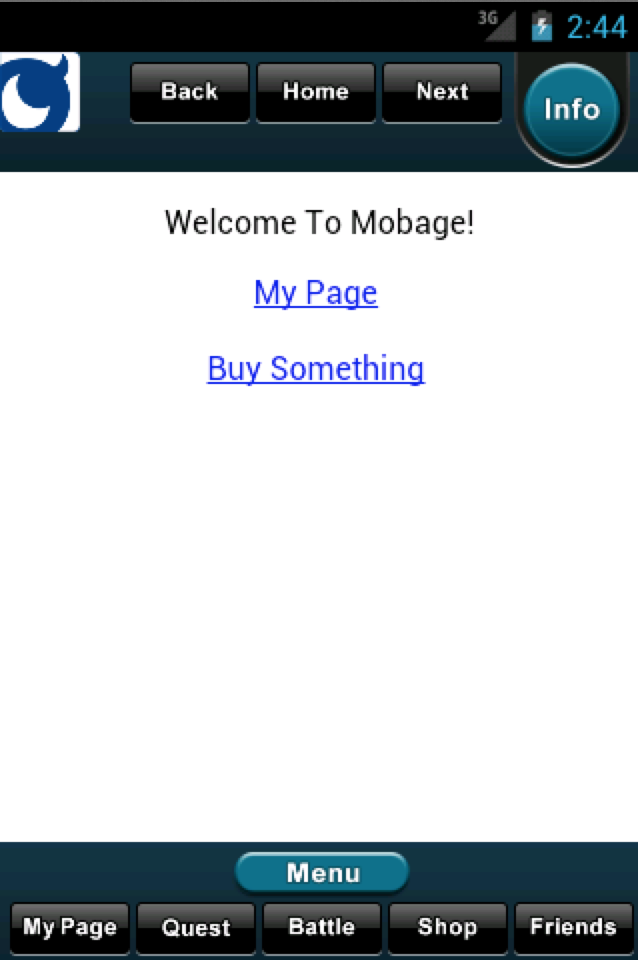
		<p>Welcome To Mobage!</p>
		<a href="?url=http%3A%2F%2Fdev.gameserver.com%2Fmypage.php">My Page</a>
		<br>
		<br>
		<a href="?url=http%3A%2F%2Fdev.gameserver.com%2Fpayment_start.php">Buy Something</a>
	</body>
</html>
Relaunch the client application that was installed on the actual device in the previous chapter. While it is starting up, press the Home button at the top to update the start page. You should see that the Buy Something link has been added as shown below.
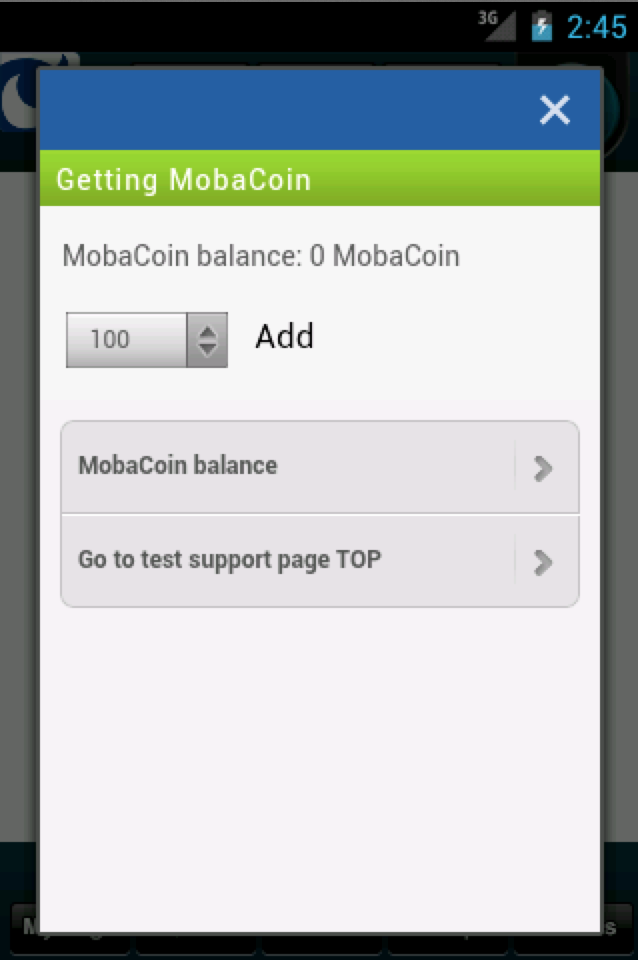
If you click Buy Something to switch screens and tap Click to Buy MobaCoins, the MobaCoin purchase dialog will be displayed as shown below. Since coins can be assigned freely in the Sandbox environment, they should be purchased in advance. For iOS, the MyPoints that you set up earlier will be assigned.
When you click Click to Buy Sample Item, the in-game item details screen should be displayed.
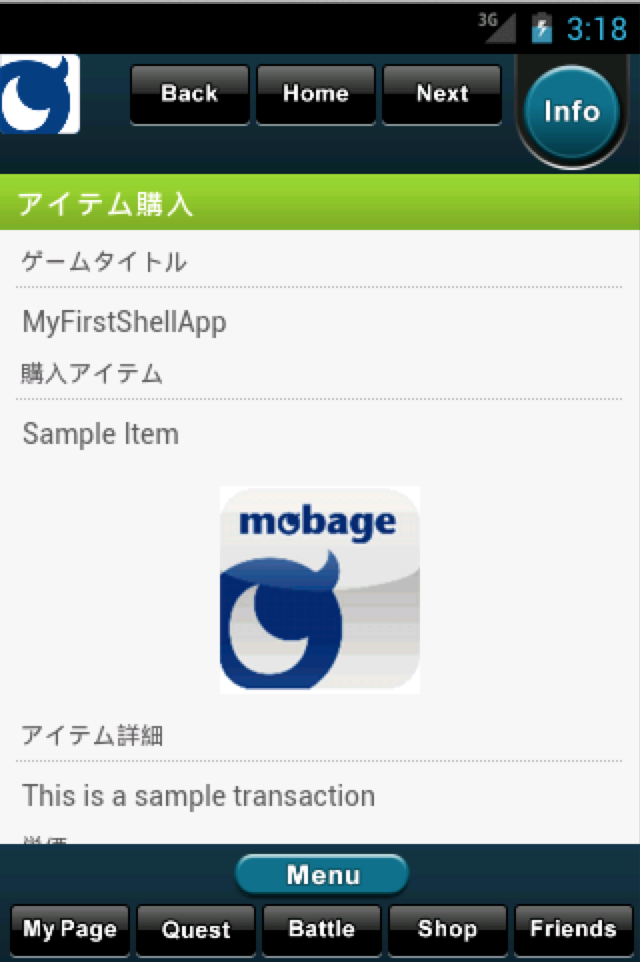
When you click Buy, the screen should change to the settlement screen provided by the platform.
When the purchase has completed, payment_callback.php is called and then the screen changes to payment_finish.php which completes the settlement process.
Opening the MobaCoin Purchase Dialog from the Header Button
You can also cause the MobaCoin purchase dialog to be displayed from a button in the header or footer.
On the Mobage Developer Portal, click "Manage Application" > "MyFirstShellApp" > "Android" > "Layout" as described in the previous chapter. The href attribute of the button element corresponding to the Info button on the right side of the header will invoke showBankUI as follows.
<button
	height="116"
	href="showBankUI"
	left="514"
	normal="ui_black_header_info.png"
	over="ui_black_header_info_on.png"
	soundeffect="select.ogg"
	top="0"
	width="116" />
Tap the Info button in the header and verify that the MobaCoin purchase dialog is displayed.
Recovering from Omitted Item Assignments
When displaying the Purchase Completed screen, you must take into consideration the case when a problem occurs and the item has not been assigned regardless of whether MobaCoins were consumed. This case must be handled through special processing. Although it is not implemented in this tutorial, the API server returns a settlement status other than 10 for a Payment Id when the corresponding item was not assigned in the billing history that is stored in the game server's database. This indicates that the assignment of the item was omitted.
To extract these database records, you can use the following SQL statements.
SELECT * FROM payment WHERE status=10 AND item_given=0; // Extract settlements that were completed but for which assignment of the item was omitted
Note that to extract records for cases in which, by chance, settlement was not completed but the item was assigned, you can use the following SQL statement.
SELECT * FROM payment WHERE status!=10 AND item_given=1; // Extract settlements that were not completed but for which the item was assigned
If records like those shown above exist, operations must be performed to return things to the correct state.
For normal situations, you can use the following SQL statements to extract these records.
SELECT * FROM payment WHERE status=10 AND item_given=1; // Extract settlements that were completed successfully
SELECT * FROM payment WHERE status=1 AND item_given=0; // Extract settlements that ended with an error
SELECT * FROM payment WHERE status=0 AND item_given=0; // Extract settlements that were canceled
This completes the tutorial for charging items.
Reference Material
For more information about the Payment service, please see here.
For more information about the Payment API, please see here.
For more information about the JavaScript showBankUI, please see here.
Revision History
- 02/07/2013
- Added the procedure for iOS
- 01/10/2013
- Changed the implementation to make the code more robust
- 09/30/2012
- Initial release